SPECIAL: RECIPE FOR CHUSEOK
A RECIPE FOR CHUSEOK
BY SHARON STERN
This was my first year celebrating Chuseok and I was determined to make it a special celebration. We have a Korean friend who lived here, but now lives in Korea, but is visiting and we didn’t want her to be alone for Chuseok! My good friend, who shares a love in all things Korean, vowed to help out. She said she would bring the soju and make jeon. I promised to make japchae and songypeon. I thought to myself, “How hard can noodles and vegetable be?” Well, first of all, we need to call it CHOP-chae because all you do is chop, chop, chop and chop some more. Prepping the veggies and then frying them one by one was a mighty task. But in the end, it was totally worth it and we had a wonderful feast.
We thought it would be fun to share a Chuseok recipe with everyone this month. It might seem like an intimidating thing to try to make songpyeon, but they aren’t that hard to make! Our Korean friend said that we got the taste right, which is a really big compliment. The only not-so-common tool that you need to have on hand is a bamboo steamer. There are a couple of ingredients that you might not find in every supermarket, but if you can line those up, you’ll see that this is a fun recipe to make.
DOUGH INGREDIENTS
1 Cup of wet rice flour (long explanation below)
1/8 tsp salt
2-3 tbsp hot water, more as needed
FLOUR NOTES
Here's the situation with the flour. You can buy frozen wet rice flour in an Asian store. That could be the easiest method. You can try to soak short grain white rice and grind your own. Uh, no. Or you can cheat. That’s what we did. Here’s what you do:
Mix 1 Cup of white rice flour (this has to be PLAIN white rice flour or what is called white rice powder – it can be found in Indian as well as Asian groceries) with 1/3 Cup of Sweet White Rice Flour (not the same thing at all) and 1/8 tsp of salt.
I found both of these flours in my local health food store.
Then add 3 tbsp of cold water and mix with your hands to distribute the water throughout the flour. You can push it through a sieve, but we didn’t do this – just mixed it up with our hands.
Cover the flour and let it sit for a few hours or overnight. This lets the water absorb into the flour. Just treat this as though it is wet rice flour when you get ready to make the rest of the recipe. What that means is that you will be adding more salt and hot water to this mixture to make the dough.
FILLING INGREDIENTS
Any of the following:
Sesame seeds
Peanuts
Adzuki beans (cooked)
Black soy beans (cooked)
Mung beans (cooked)
You don’t have to have more than one of these: Sugar and Honey
MIXING THE DOUGH
Mix the ingredients with your hands and knead the dough for about 4-5 minutes in the bowl. If the dough sticks to your hands, add a tiny bit more flour. If it is too crumbly, add a bit more hot water. The dough, I read, should feel the same as when you pinch your earlobe. That’s a pretty clear description! Once you have the dough the correct consistency, cover it and let it rest for 20-30 minutes. If you are going to color parts of the dough, do that now – before letting the dough rest.
COLORING THE DOUGH
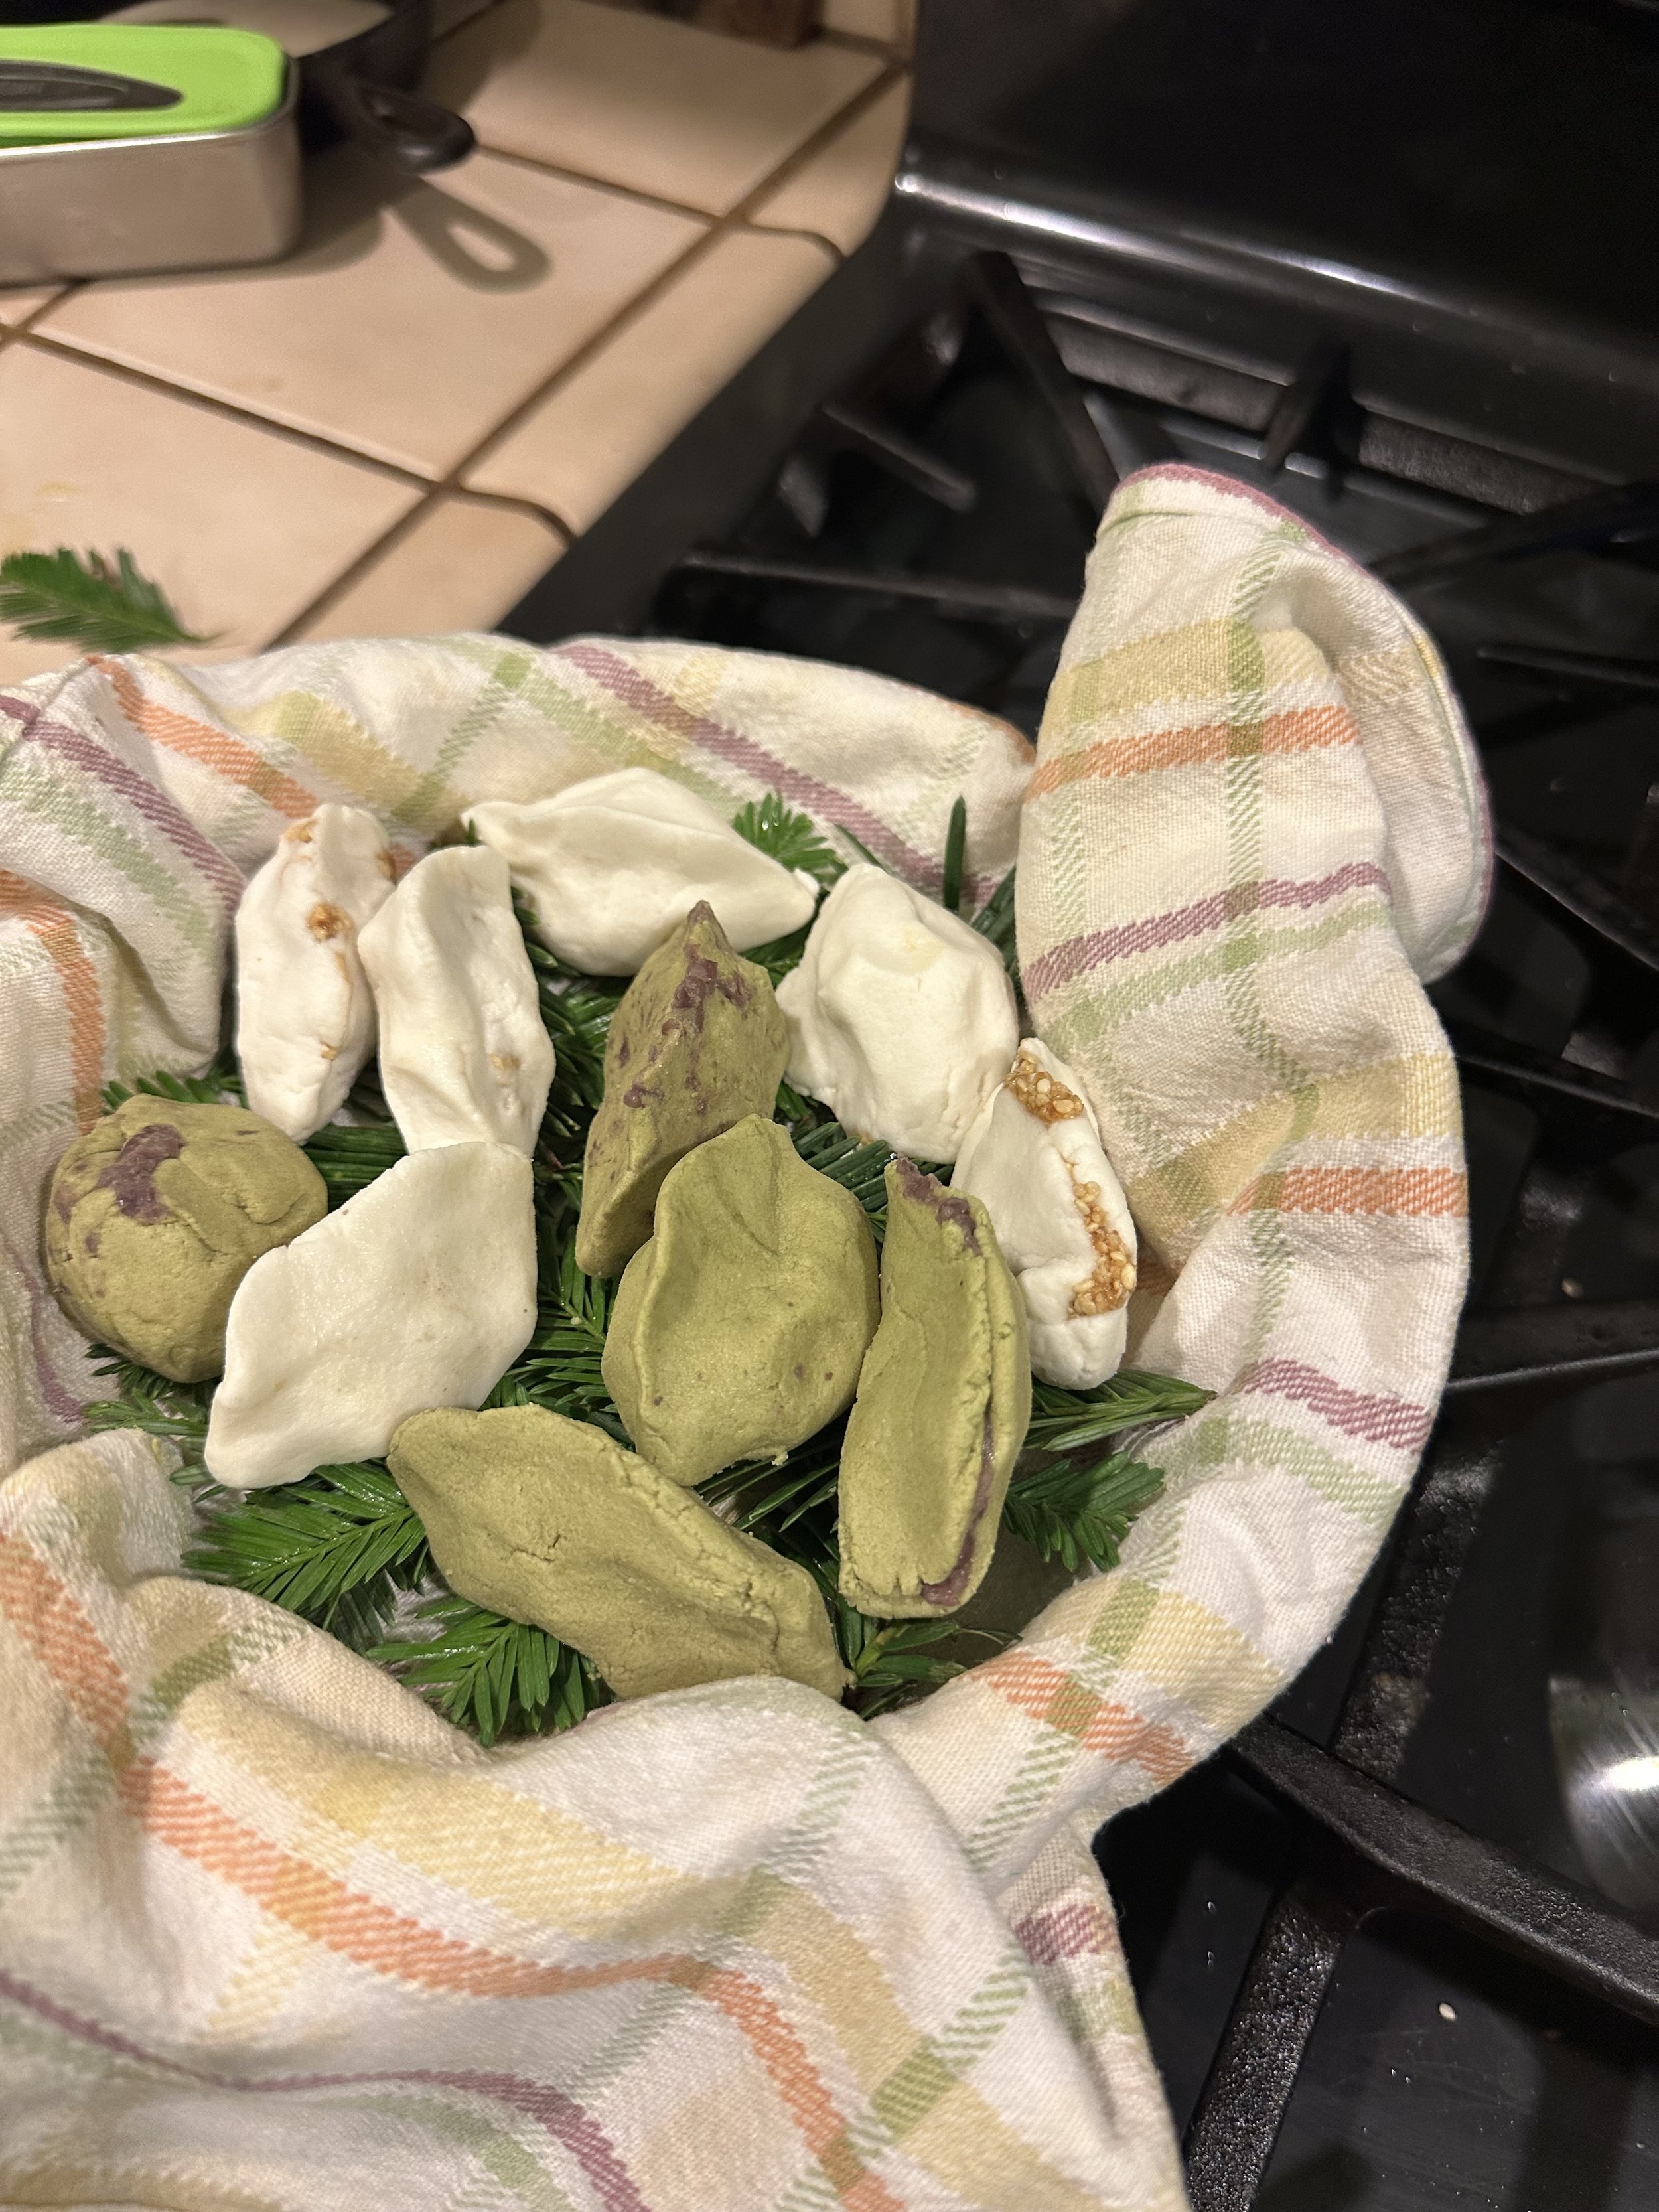
The description using 1C of wet rice makes one batch of flour for the songpyeons. You want (at least) one batch for each color you will make. You leave one batch white, with no color. Traditional colors are white, green, purple and deep yellow. You can use different things to color the flour.
Mugwort powder is traditional for green, but we used matcha tea powder.
Purple sweet potato powder is traditional for purple, but we used beet powder.
Pumpkin powder is traditional for yellow and we didn’t have anything deep yellow other than turmeric. We skipped the yellow because we thought turmeric might add too much of a flavor.
You use about 1 tbsp of color for each batch of the flour. When you mix in a color, you may need to add some more hot water to get the dough to the right consistency. Add it a very little at a time. Get the dough to the correct consistency and let it rest for 20-30 minutes.
FILLINGS
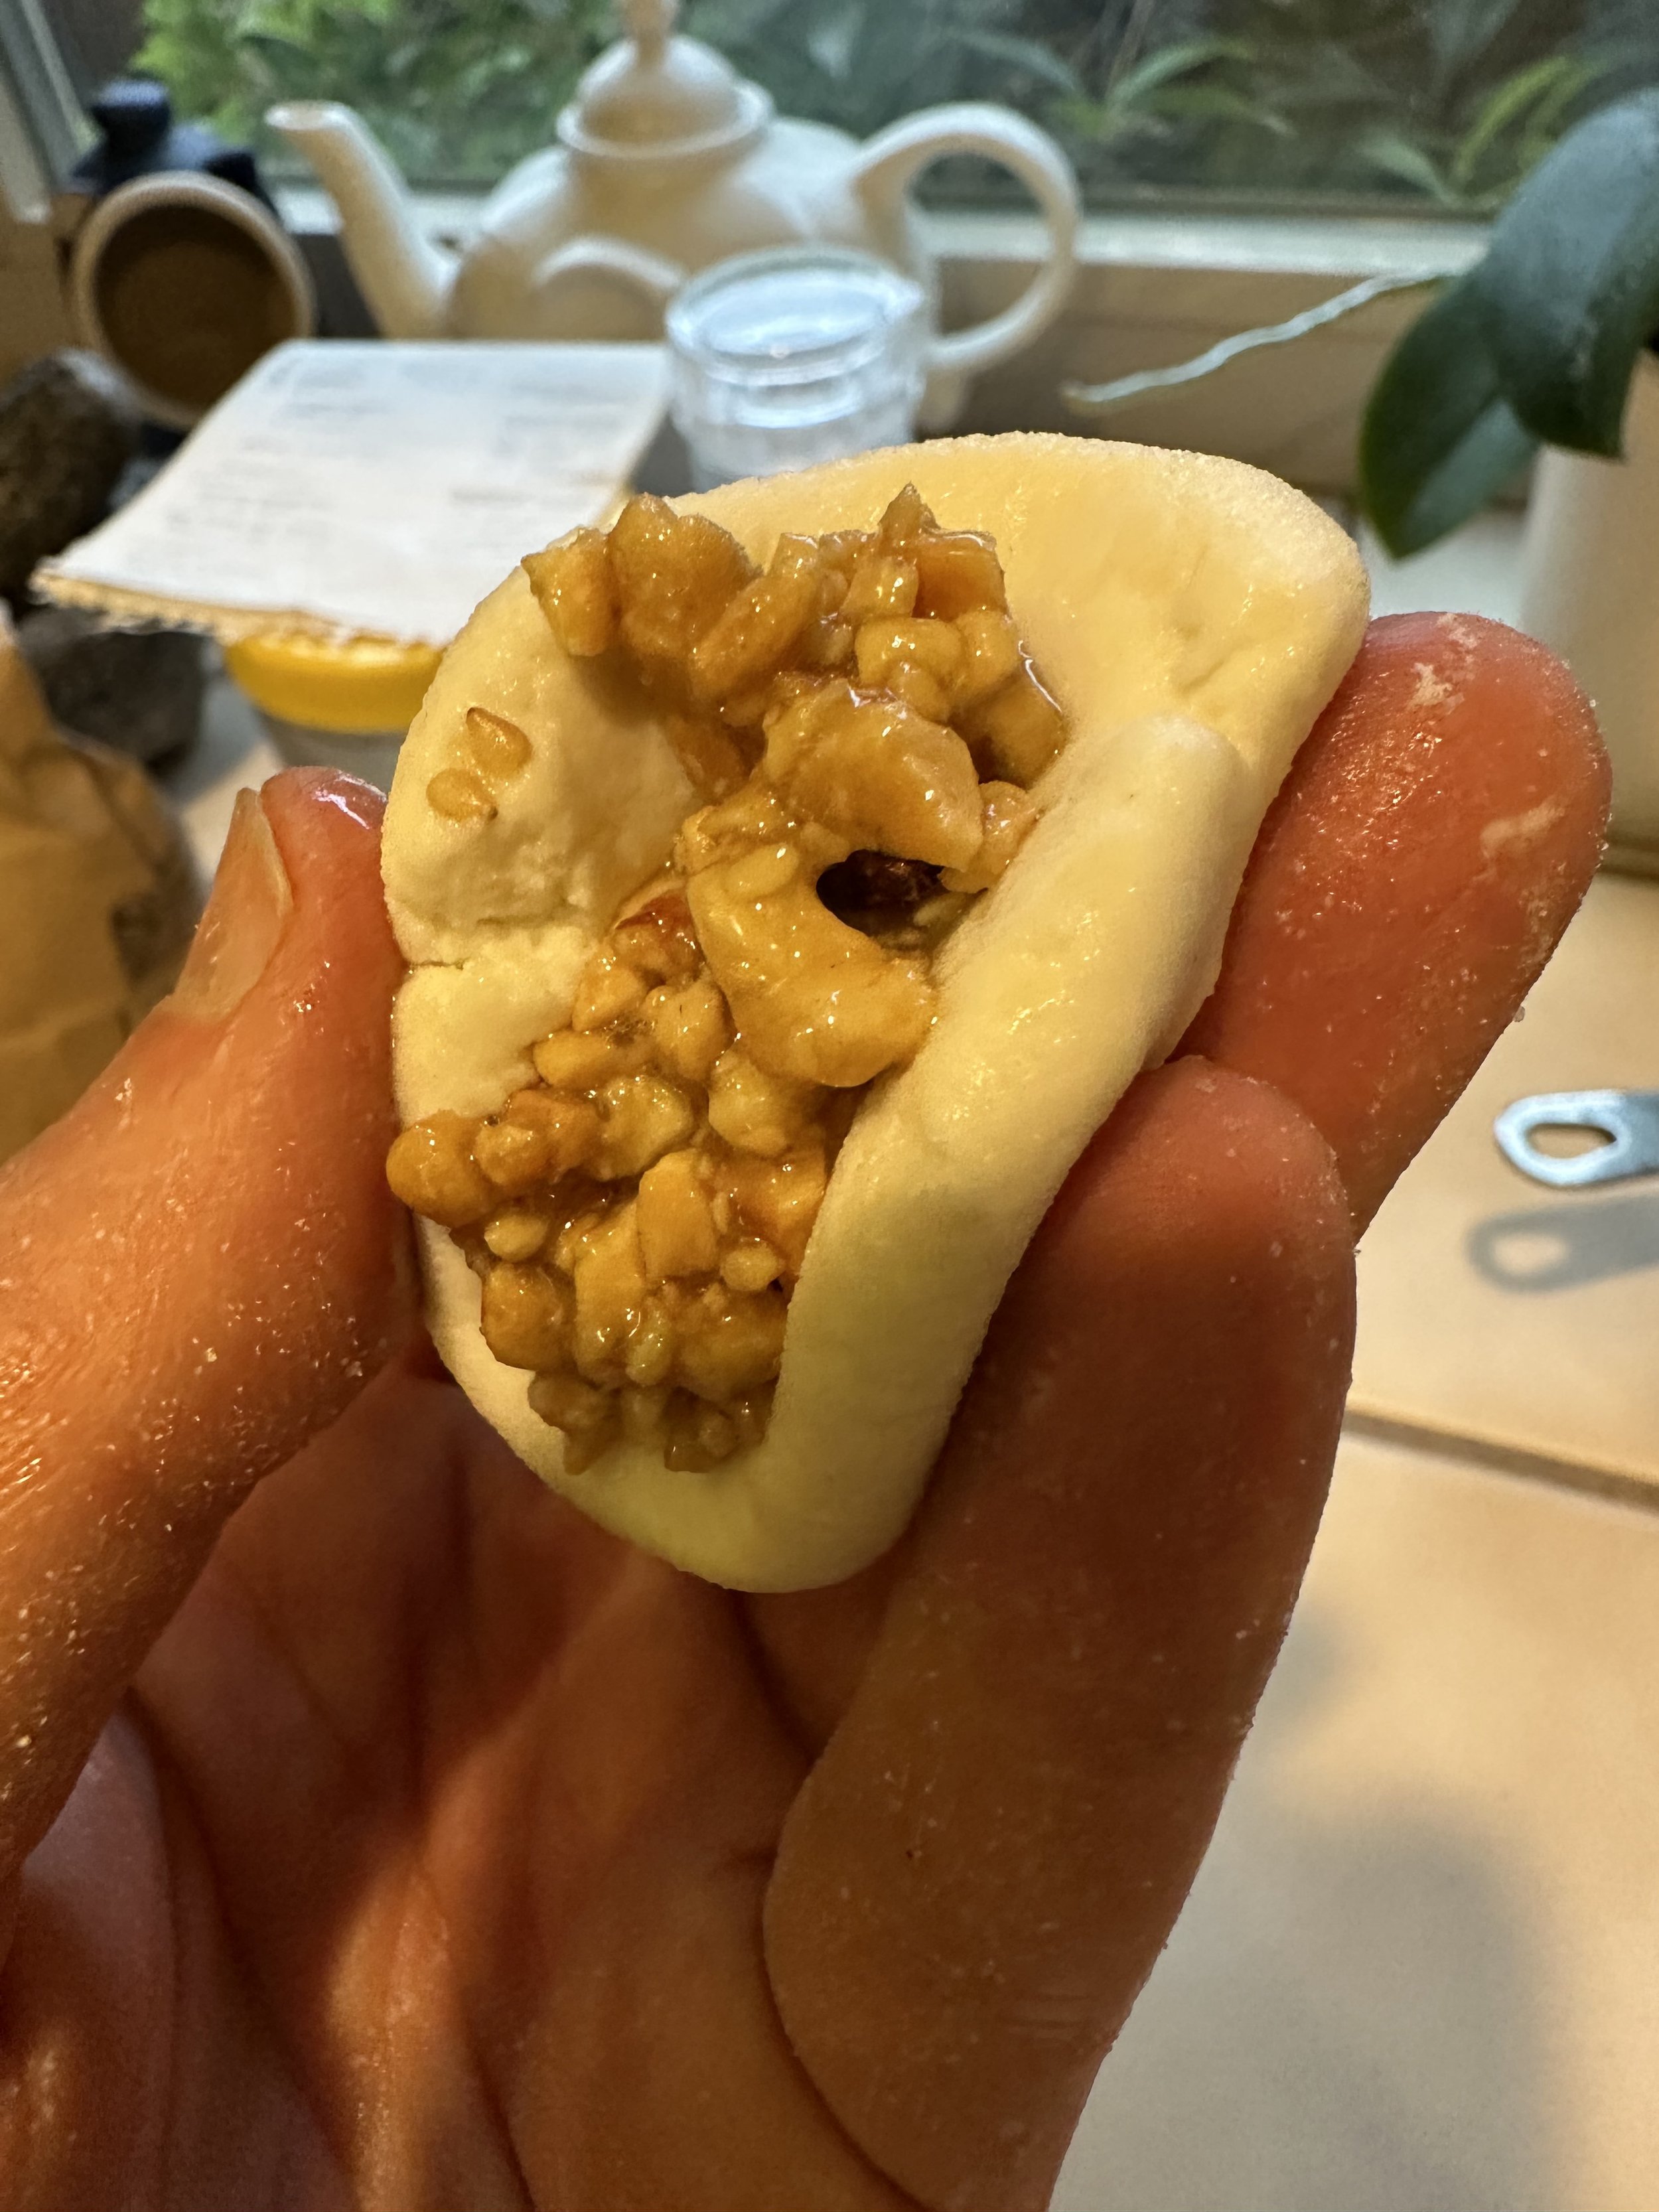
The fillings can be made of different things and they are super simple to make. We used three different fillings: toasted sesame seeds, peanuts, adzuki bean.
If you are using sesame seeds or peanuts (raw), toast them in a clean, empty pan on medium heat.
Move them continuously so that they don’t burn. Let them get just a little golden brown and remove them from the heat and from the pan.
Adzuki beans have to be soaked overnight and boiled for about 40-45 minutes. The same is true with mung beans and black soy. Not difficult.
The sesame seeds and peanuts need to be chopped up a bit after they are toasted. You can pulse them in a food processor, pound them in a mortar and pestle, bash them in a Ziploc bag with a rolling pin – whatever works for you. They shouldn’t be bashed into dust – just broken up.
The adzuki beans need to be mashed. Again, you can put them gently through a food processor or take a potato masher and mash them.
For all three of these fillings, you just add sugar and honey to taste. The honey sticks the filling together, so it’s kind of important. We started with a teaspoon of sugar first, added honey and then tasted and adjusted as needed. Remember that the dough is bland, so the filling needs to be sweet enough for the whole songpyeons.
SHAPING
Take a bit of the dough of any color – enough to make a small ball. It shouldn’t be quite as big as a golf ball.
Roll the dough into a ball
Make an indentation in the middle of the ball by simply poking a finger into it
Pinch the sides of the dough so you have a small pinch pot (ceramics reference)
Put a little bit of filling into the dough
Pinch the edges closed, making a half-moon shape
That’s it – put your songpyeon in the steamer!
Repeat until you run out of dough
STEAMING
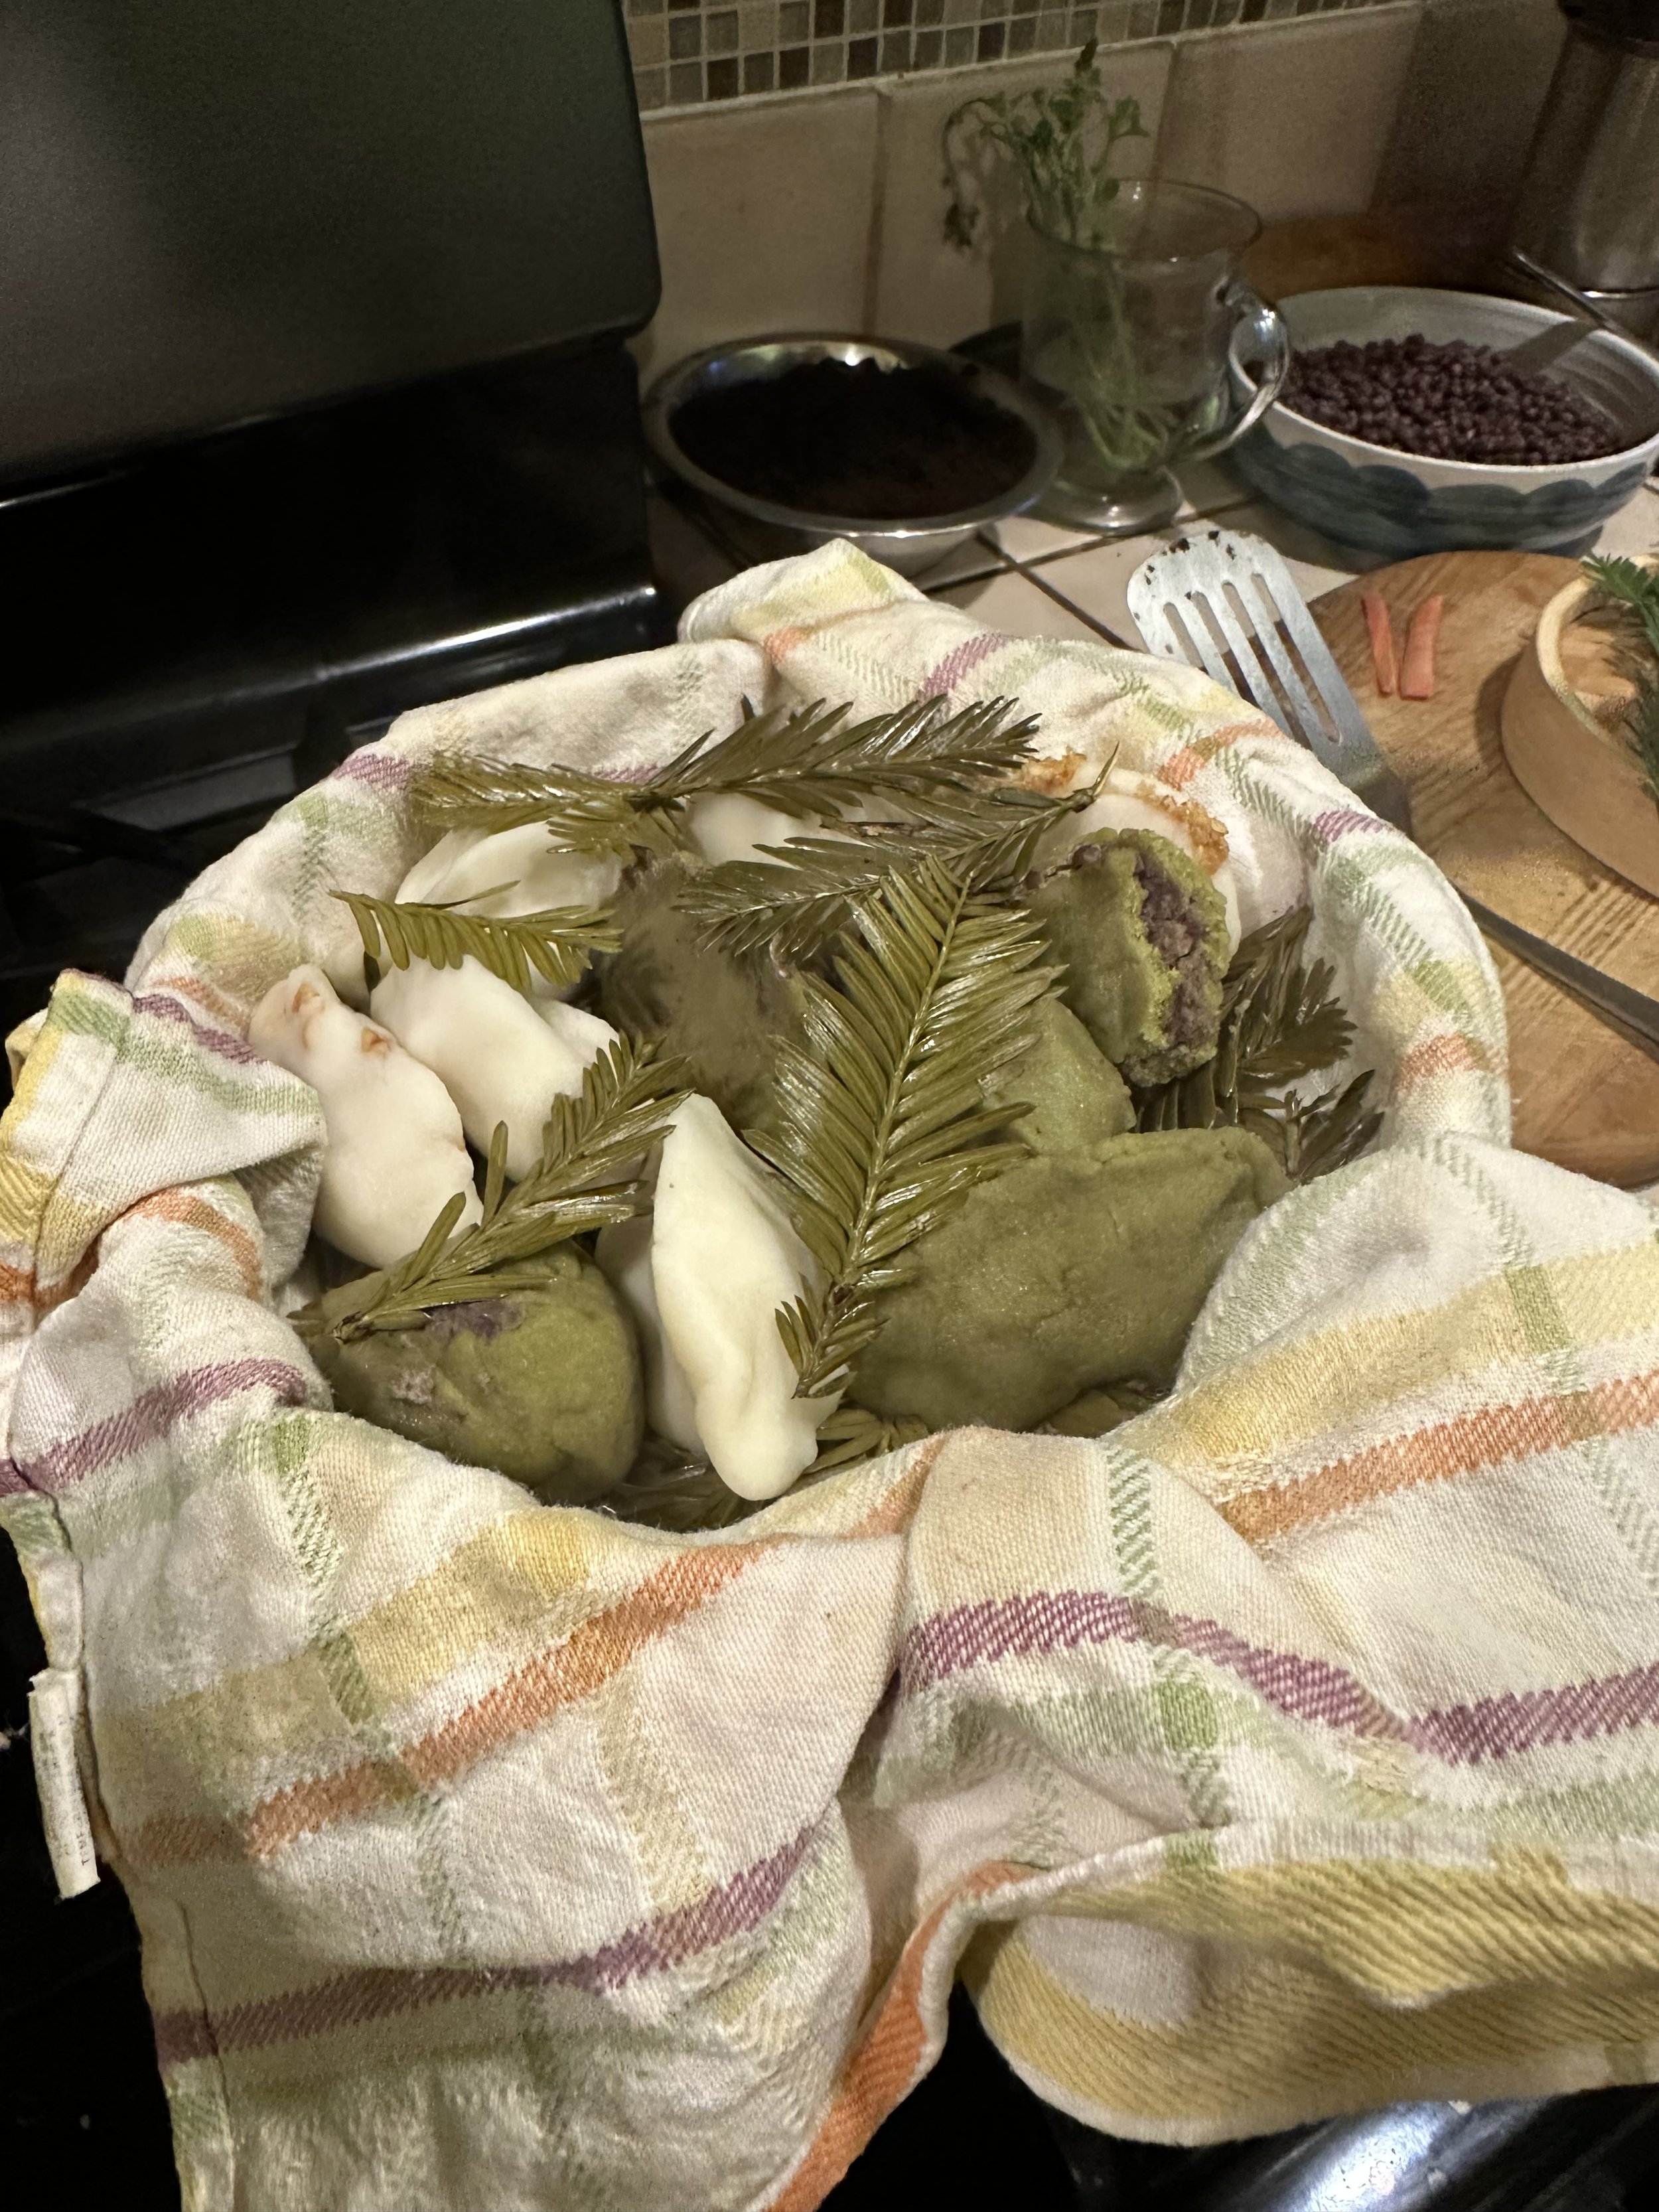
Now, here’s a really important key thing. You have to have pine needles for the steaming process. This is super important. They give flavor to the songpyeons and the songpyeons will not taste right if you don’t have these. If you’re in the city, you may have to hunt around a little to find this one thing. Any tree with needles will work – the species of tree is not too important. I don’t think I would use Douglas Fir, but any long or short needled tree should do. If you go grab them off a tree, like we did, make sure you wash them really well.
Get your steamer set up on a pan with about an inch of boiling water.
You want a wet kitchen towel (not a terry one) for both the bottom of the steamer and the top.
On the bottom of the steamer, lay a damp kitchen towel and a layer of pine needles
Place your songpyeons, not touching, in the steamer
Put another layer of pine needles on top of the songpyeons
Put the other damp towel on top of the songpyeons and the lid of the steamer
Make sure the towels don’t hang down the pan so that they don’t burn the songpyeons about 15 minutes
They should be firm but not hard at the end.
You can dip them in ice water to stop the steaming process, but we didn’t do that
Brush them with the sesame oil (to be honest, we gobbled up a bunch of them before they could get the oil brush)
맛있게 드세요! Bon Appétit!


